Step 1: Carefully press out all the components from the plywood backing sheet.
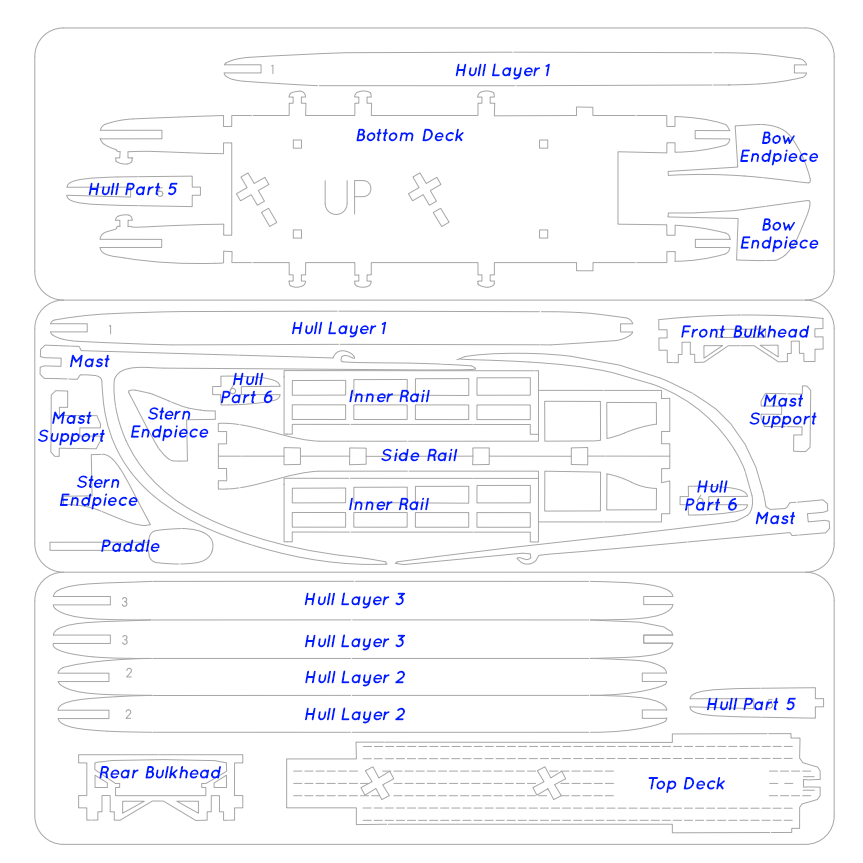
Step 1: Carefully press out all the components from the plywood backing sheet.
Step 2: Glue front and rear bulkheads to top deck.
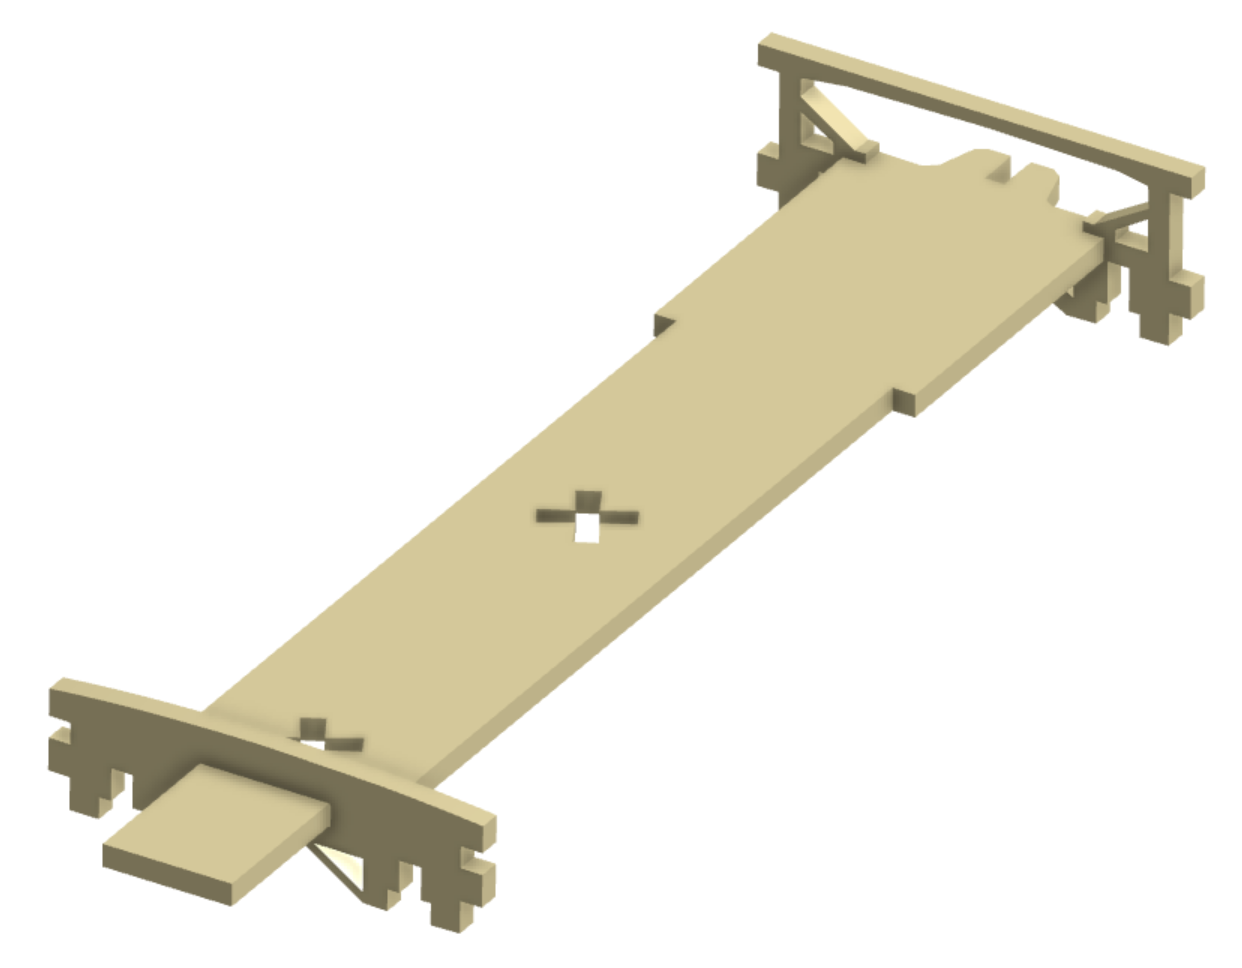
Step 3: Glue side rails to front and rear bulkheads.
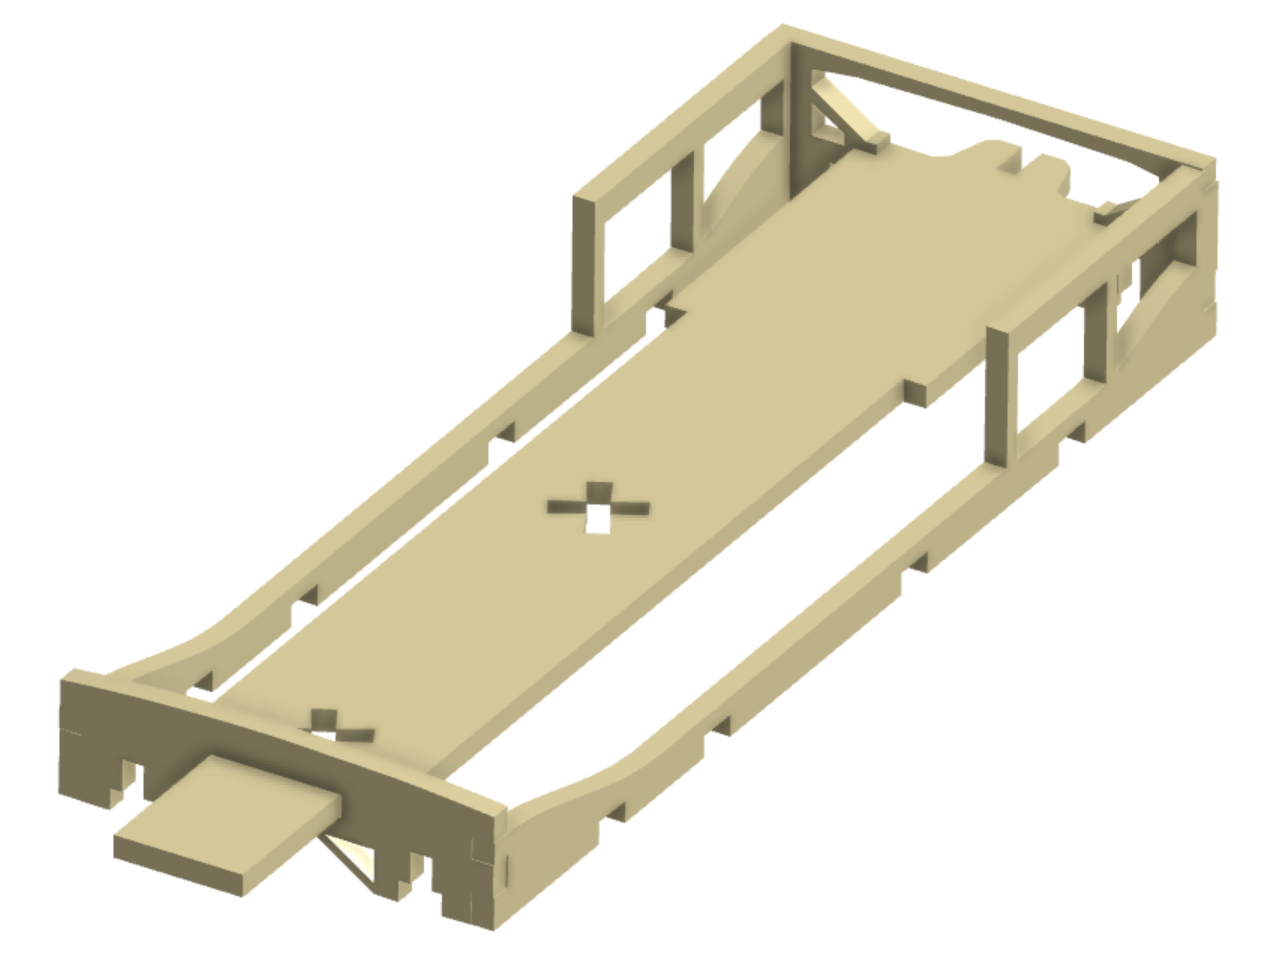
Step 4: Glue tabs on bottom deck into matching slots in the side rails and bulkheads of top deck. Visual has transparent top deck to illustrate.
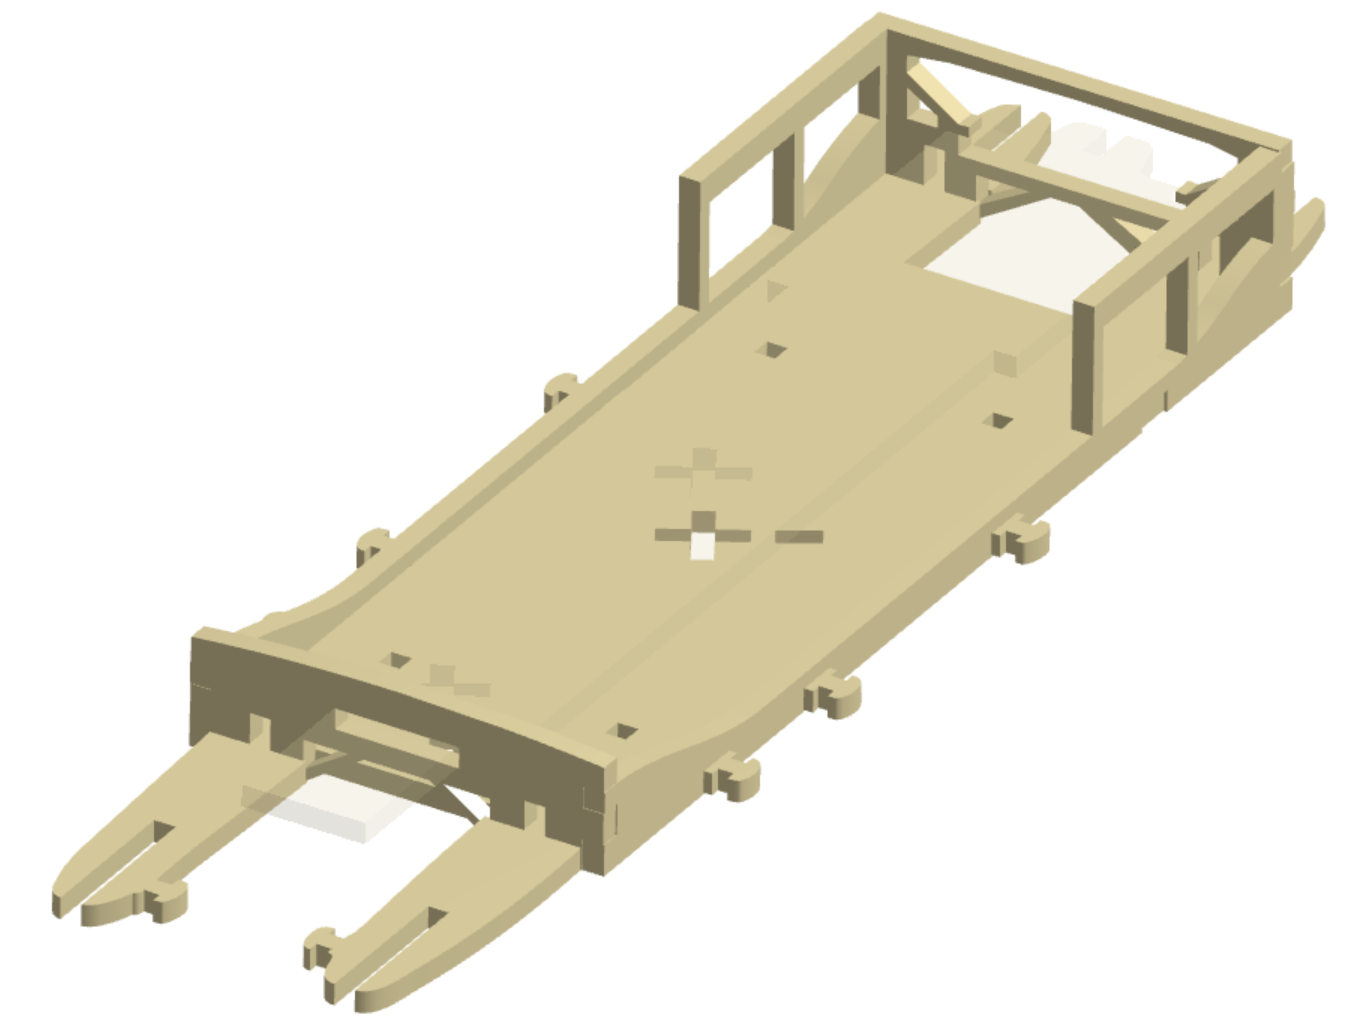
Step 5: Glue a mast support into each of the corresponding slots in the underside of the bottom deck. Visual highlights the mast supports.

Step 6: Glue tabs of inner rails into the slots on the top of the bottom deck.
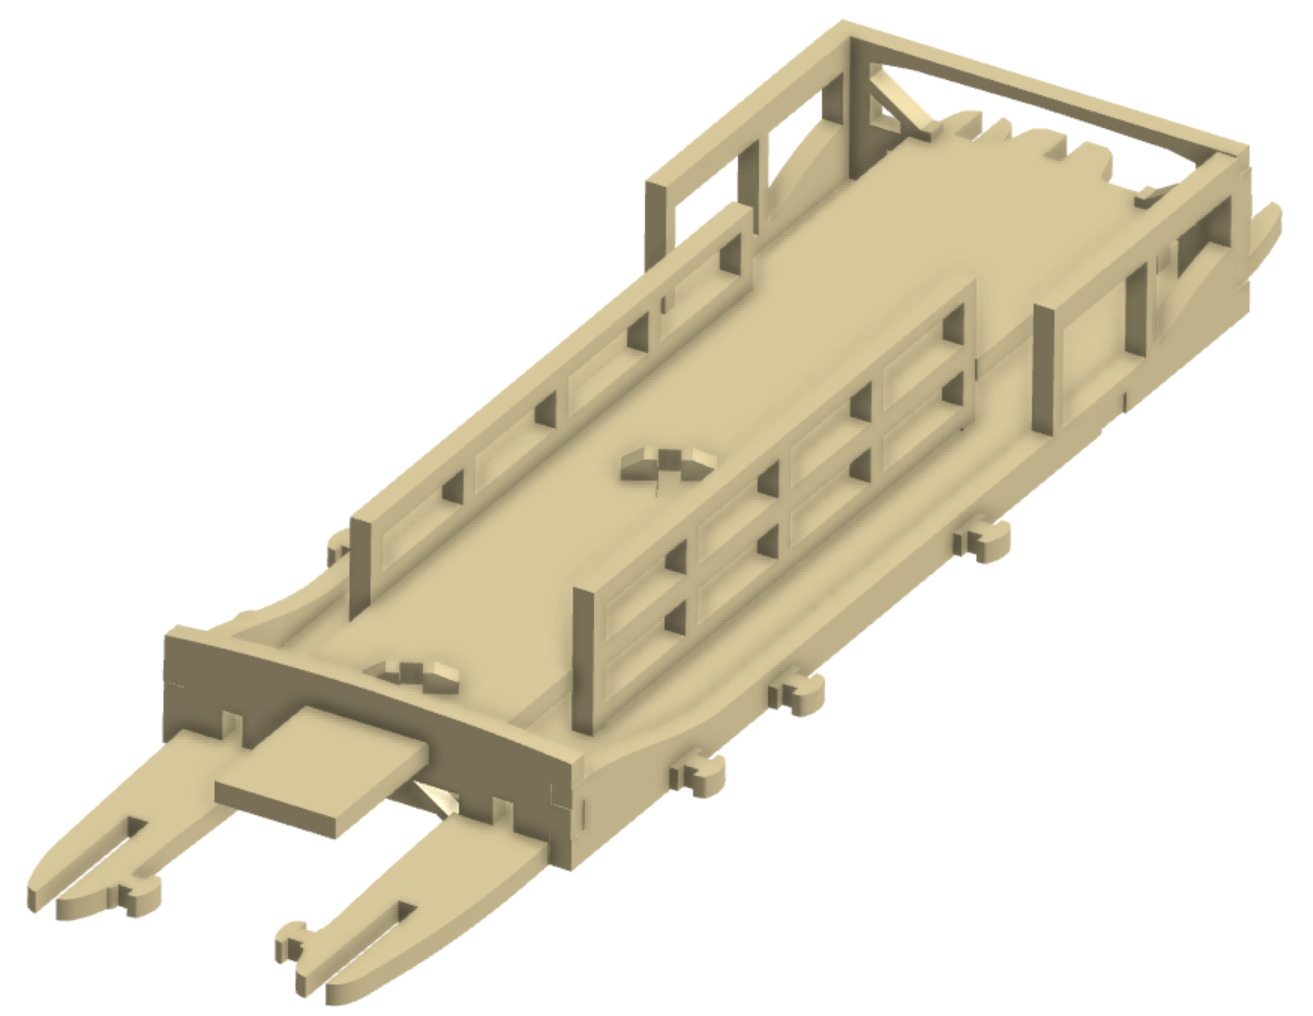
Step 7: Glue a hull part 5 into each front slot on the bottom deck, and a hull part 6 into each rear slot.
Step 8: Glue a bow end piece into each front slot on the bottom deck, and a stern end piece into each rear slot.
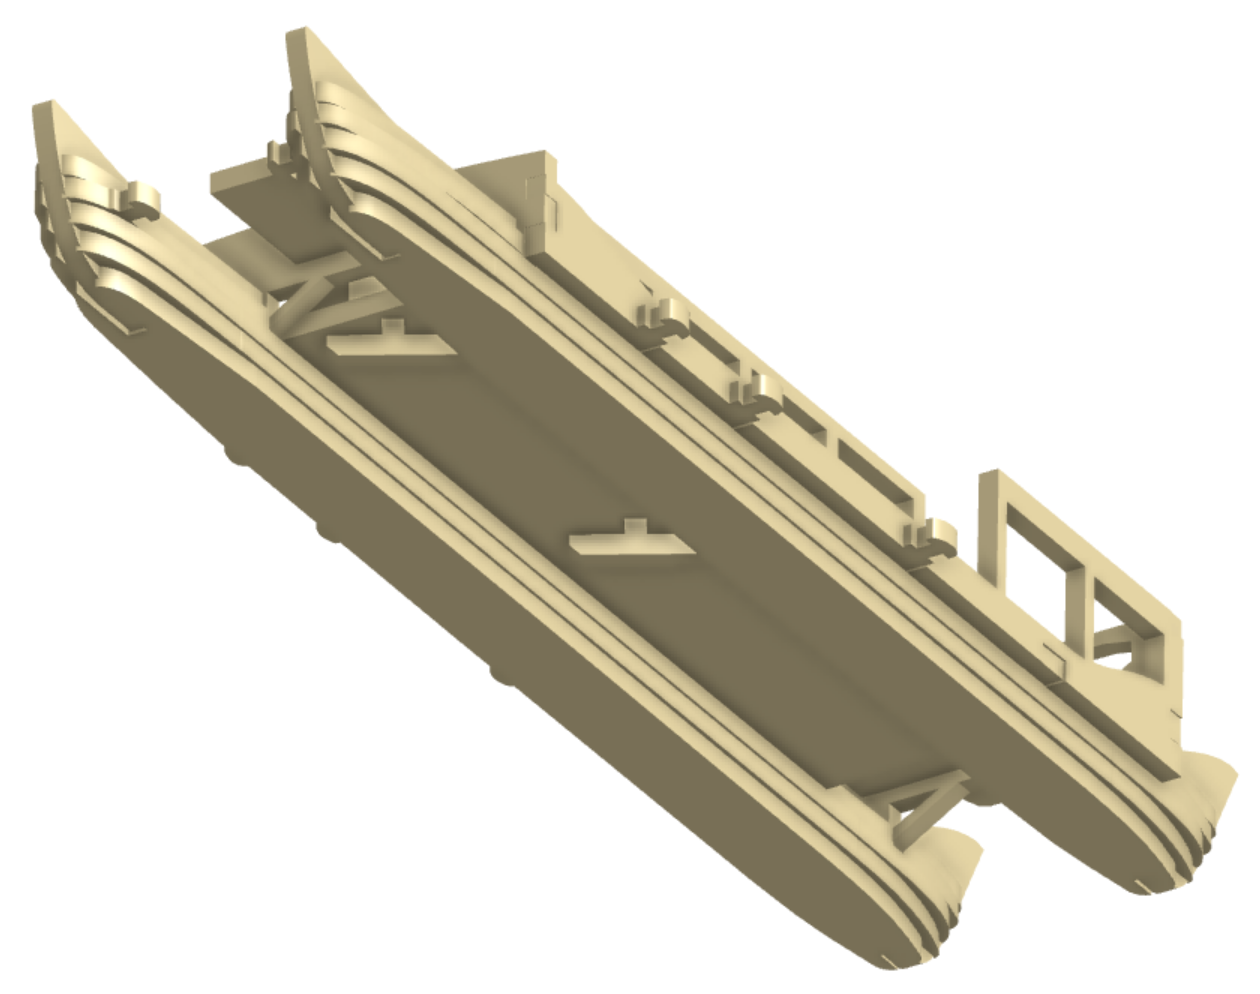
Step 9: Turn deck assembly upside down and glue on hull layers beginning with hull layer 3, then hull layer 2 and finally hull layer 1.
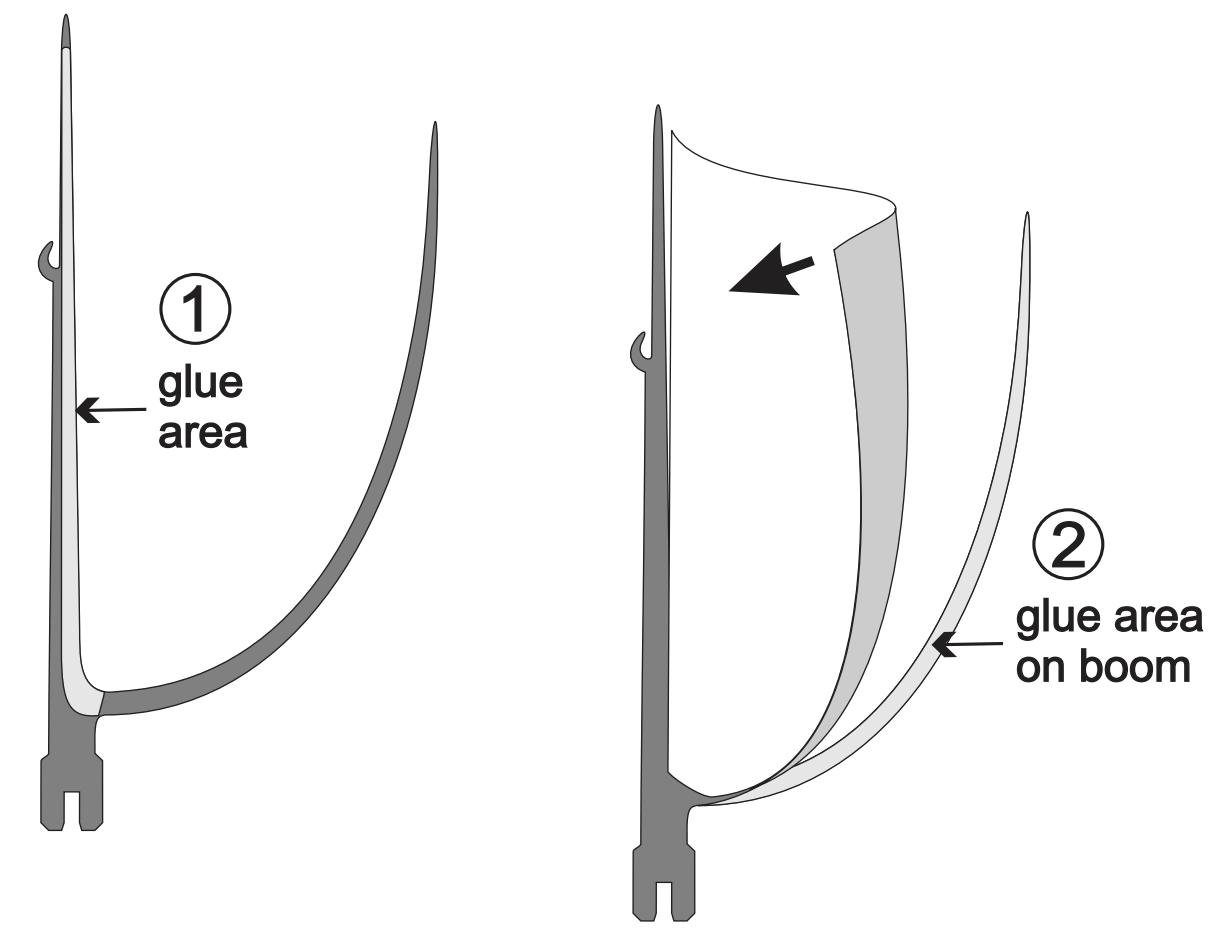
Step 10: Glue only straight-face of mast using toothpick. Align the straight-edge of the sail to the mast. Press the sail onto mast. Hold sail away when applying glue to the face of the curved boom. Beginning at the bottom, press the curved edge of the sail onto the curved boom to create a billowed effect.
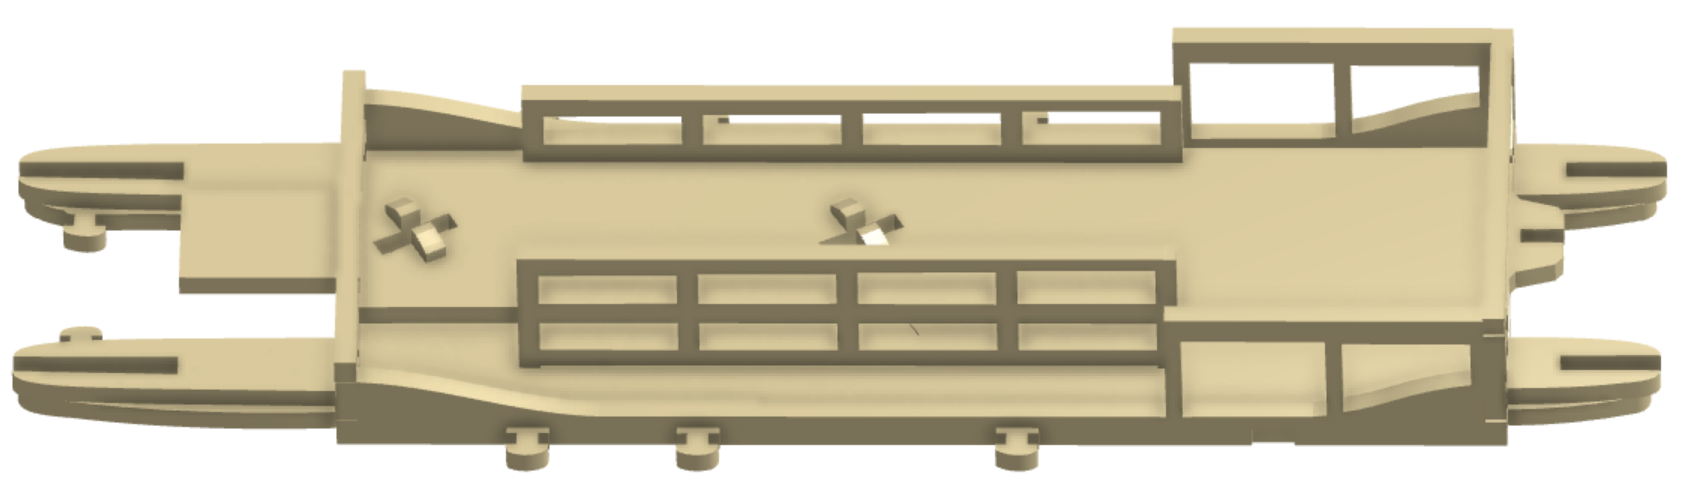
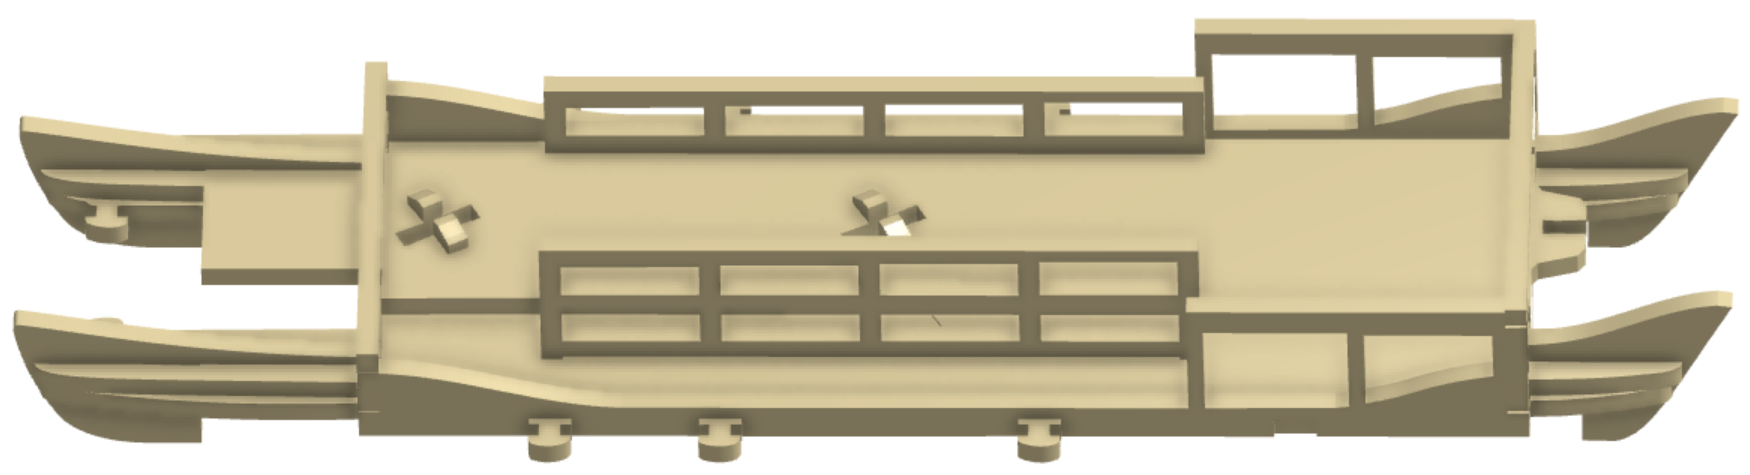
Step 11: Glue mast onto mast supports and into X shaped holes on top deck.
Step 12: Cut cord in 4 segments. Loop first cord 2 times around tab 1a and lock with a double slip knot around the cord. Loop the cord over the halyard horn 1b. Loop the cord 2x around the tab 1c and lock with a double slip knot around the cord.
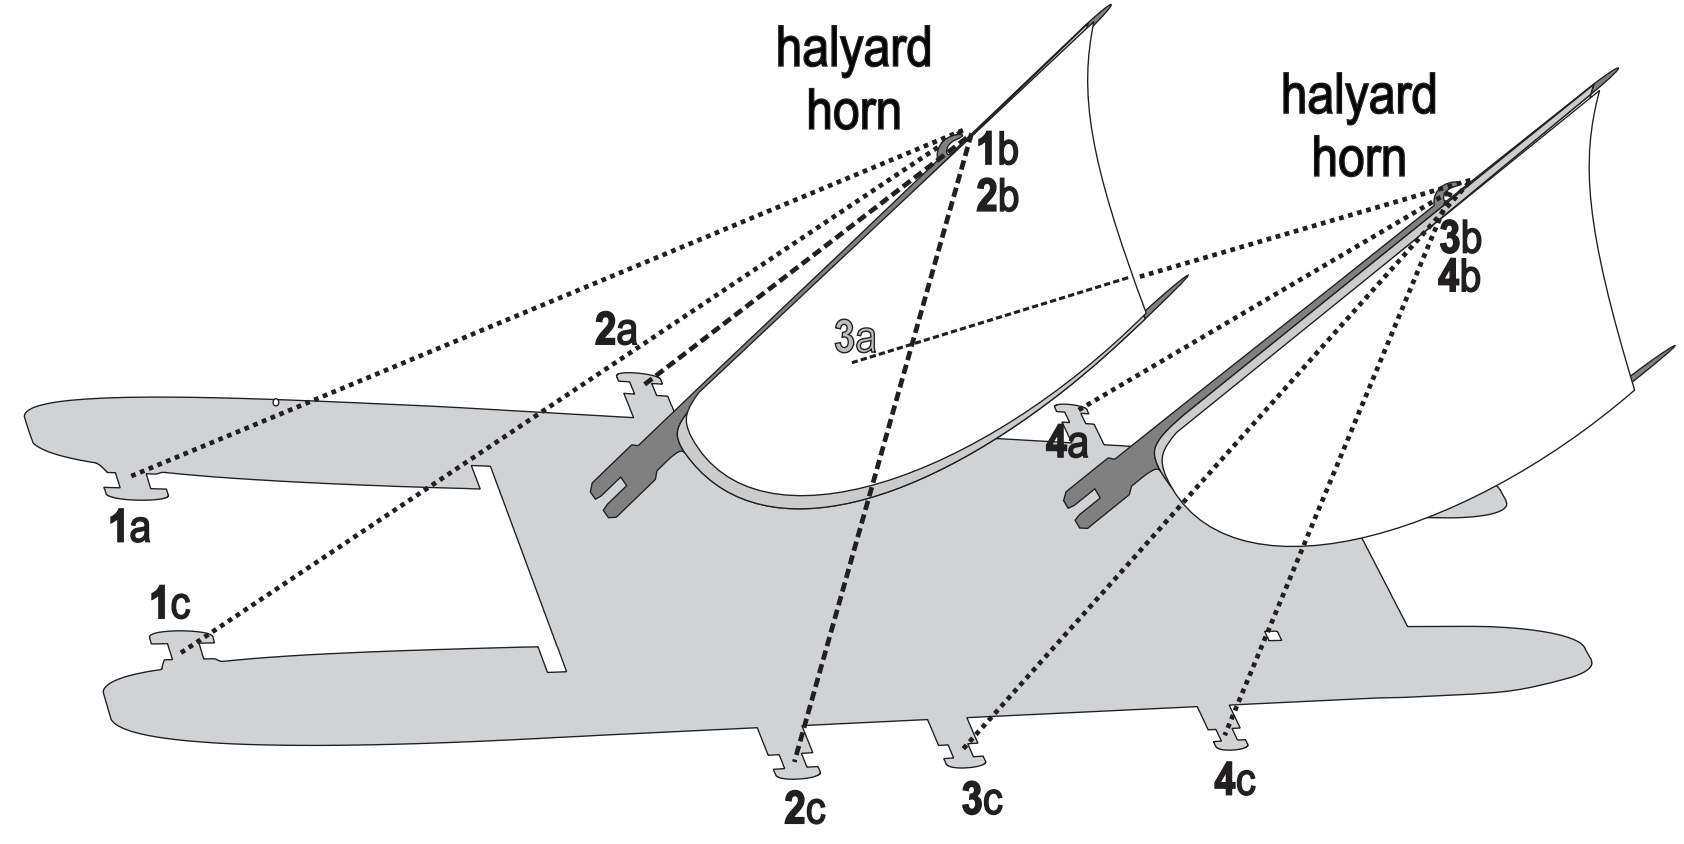
Step 13: Repeat process for the second, third, and fourth cords.
Step 14: Wedge paddle handle into the paddle holder at the rear of the deck.